So, yes, I know I just wrote about strawberries, but 'tis the season! Last year I ordered the 30-pound pail of sliced strawberries from the local Kiwanis group and they were so good (and convenient!) that this year I doubled my order. We use them for everything: freezer jam, smoothies, strawberry lemonade, stirring into plain yogurt, and topping waffles and ice cream. And in case you're curious, 60 pounds of strawberries fills 29 quart freezer bags. Yum! And I have no doubts that we'll finish them before this time next year...
If you have any favorite uses for frozen berries I left out, I'd love to hear them in the comments!
Showing posts with label cooking. Show all posts
Showing posts with label cooking. Show all posts
Tuesday, June 22, 2010


Saturday, June 19, 2010
Fresh Strawberry Cupcakes
Strawberry season is finally in full swing in western Oregon, and so as the kiddos and I picked 10 pounds this morning, I thought it was time I share our new favorite recipe for fresh strawberry cupcakes. We just discovered these at Easter when Trader Joe's had some particularly good strawberries in, and they were so good that Mugger requested them for his birthday this week.  So the recipe is found here at Just Jenn Recipes -- you'll have to click through for the link. We (and by "we" I mean Other Half as he is the Chief Cupcake Baker in this house) pretty much follow the recipe as it's written until the frosting part. We haven't tried her suggestion for chocolate frosting -- Other Half made strawberry frosting for Easter and white frosting with a strawberry garnish for Mugger's birthday.
 The best thing about this recipe is that the unfrosted cupcakes freeze well, so you can double or triple the batch if you need to use up lots of berries. And if you leave the frosting off, you can call them muffins and serve them for breakfast, too!
 Can't wait to get my sliced strawberries this week -- this year we're getting 2 30-pound pails instead of just one!
 So the recipe is found here at Just Jenn Recipes -- you'll have to click through for the link. We (and by "we" I mean Other Half as he is the Chief Cupcake Baker in this house) pretty much follow the recipe as it's written until the frosting part. We haven't tried her suggestion for chocolate frosting -- Other Half made strawberry frosting for Easter and white frosting with a strawberry garnish for Mugger's birthday.
 The best thing about this recipe is that the unfrosted cupcakes freeze well, so you can double or triple the batch if you need to use up lots of berries. And if you leave the frosting off, you can call them muffins and serve them for breakfast, too!
 Can't wait to get my sliced strawberries this week -- this year we're getting 2 30-pound pails instead of just one!
Monday, June 14, 2010
Coconut Oil Granola: The Best Ever!
Sometimes I have the best of intentions, but then... well, you know how it goes. Such was the case with my purchase of Salad People by Mollie Katzen nearly 3 years ago -- I wanted to be that mom who cooked with her preschoolers so that they'd develop an enthusiasm for cooking and healthy eating at a young age. Well, the kiddos finish 1st grade and Pre-K this week, and here I am opening up Salad People with her for the first time. This awesome book would probably still be sitting on the shelf if not for the urging of my friend, Anna, who told me we had to try the granola recipe. A month later, we did, and wow!
 We didn't stray too far from the recipe, being that I'm a Kitchen Catastrophe and all. I did skip the nonstick spray for the baking tray since I have one of those nifty silicone baking mats (which I highly recommend as it cuts way down on greasing pans!) For the 2 cups combined seeds and nuts I used about a cup of almonds, 3/4 cup of sunflower seeds, and 1/4 cup ground flaxseeds -- I'm all about cramming that healthy stuff in there when I can. I did have one ingredient switch that I think made a huge difference in the flavor: instead of canola oil, I used coconut oil. The smell and flavor was phenomenal! I know coconut oil doesn't work everywhere, but it sure works in this recipe. I think next time I might even try to cut down on the oil a bit, too.
 Bug was my helper on this one -- she did great pouring in and stirring ingredients...
 ...as well as smashing it flat into the pan for baking.
 And after 30 minutes: crunchy golden goodness!
 Broken up, this filled 2 quart jars which I've been keeping in the freezer for maximum freshness. One jar is already gone as Other Half has pronounced this to be 10 times better than anything store-bought. I had dried currants to add to it after baking, but we've loved it plain.
If anyone else has used coconut oil in granola or has a link to a favorite recipe, I'd love to hear about it in the comments!
Thursday, June 10, 2010
Easy Chocolate Cake
The kiddos had a cake walk at the school carnival last week, so last minute we decided to make this chocolate cake from AllRecipes.com. I changed a couple things based on some comments and what we had, so here's my version:
- 1 (18.25 ounce) package yellow cake mix
- 1 (3.9 ounce) package instant chocolate pudding mix
- 1/2 cup white sugar
- 3/4 cup water
- 1/2 cup vegetable oil
- 4 eggs, beaten
- 1 cup plain yogurt
- 1/2 cup chocolate chips (we used Hershey's Raspberry Chocolate Chips)
- Preheat oven to 325 degrees. Grease and flour a 10-inch Bundt pan. Stir together the cake mix, instant pudding and sugar. Add the water, oil, eggs, and yogurt, mix until well blended. Finally, fold in the chocolate chips. Pour into the prepared Bundt pan.
- Bake for 50 to 60 minutes in the preheated oven. Cake is done when a toothpick inserted comes out clean. Cool in pan for 10 minutes before inverting onto a wire rack to cool completely.
So we actually ended up making this cake twice. Why? Apparently because I, being the Kitchen Catastrophe that I am, cannot grease and flour a pan properly. Other Half cautioned me about over-flouring the pan and I think I totally under-floured it in my fear. Happily for them, my kiddos had to consume Cake #1 as it came out of the pan as a crumbled mess.
 So, while I was teaching my adult Spanish class, the rest of the family mixed up Cake #2, shown in the pictures above-- if you look closely, you can see all the excess flour on the cake as Other Half didn't want to risk repeating my error in the 11th hour. Since the cake came out of the oven after the kiddos were in bed, they got to decorate it in their jammies before school the next morning. This cake certainly doesn't need anything as it is moist and yummy and very chocolaty all by itself, but Bug had her heart set on sprinkles. So, first Other Half whipped up a basic chocolate glaze, and Bug drizzled on Layer #1. Then it got a good dusting of powdered sugar to cover up the flour, chocolate glaze Layer #2 (with help from Mugger who wanted in on the decorating action), and finally some pink sprinkles. Bug decided that the pink sprinkles would be a little clue that the chocolate chips were raspberry chocolate chips, making her cake extra special.
And special it was -- she won the award for Most Unique in the Pre-K class. As for the cake itself, it was yummy and yes, I'd make it again. I'm usually a from-scratch baker as I'm getting more conscious about what's in my food, but for a quick dessert to be made out of things I can keep in the pantry, this yellow cake mix and chocolate pudding mix combo can't be beat. Actually, a reviewer on AllRecipes gave several other variations she had tried and I think it won't be too long before I'm swapping in lemon pudding and blueberries.
Anybody got any no-fail desserts for me to try? Bug is certainly game for another round, especially if sprinkles are involved...
 So, while I was teaching my adult Spanish class, the rest of the family mixed up Cake #2, shown in the pictures above-- if you look closely, you can see all the excess flour on the cake as Other Half didn't want to risk repeating my error in the 11th hour. Since the cake came out of the oven after the kiddos were in bed, they got to decorate it in their jammies before school the next morning. This cake certainly doesn't need anything as it is moist and yummy and very chocolaty all by itself, but Bug had her heart set on sprinkles. So, first Other Half whipped up a basic chocolate glaze, and Bug drizzled on Layer #1. Then it got a good dusting of powdered sugar to cover up the flour, chocolate glaze Layer #2 (with help from Mugger who wanted in on the decorating action), and finally some pink sprinkles. Bug decided that the pink sprinkles would be a little clue that the chocolate chips were raspberry chocolate chips, making her cake extra special.
And special it was -- she won the award for Most Unique in the Pre-K class. As for the cake itself, it was yummy and yes, I'd make it again. I'm usually a from-scratch baker as I'm getting more conscious about what's in my food, but for a quick dessert to be made out of things I can keep in the pantry, this yellow cake mix and chocolate pudding mix combo can't be beat. Actually, a reviewer on AllRecipes gave several other variations she had tried and I think it won't be too long before I'm swapping in lemon pudding and blueberries.
Anybody got any no-fail desserts for me to try? Bug is certainly game for another round, especially if sprinkles are involved...
Tuesday, November 10, 2009
Links I'm Loving...
Usually I just post links I like to my Tumblr, but I've found that I don't have a great way to organize that yet. Here are some that I don't want to get buried there:
- From Zen Family Habits, "5 Ingredients. 5 Minutes. 5 Meals" If ever there was a menu plan for me, this is it! Some day I'll get real brave and write a "My Life as a Housewife" post, but I am the world's most timid cook. A perfectionist/procrastinator who never really learned how to cook is not the most ideal person to let loose in the family kitchen, but sometimes the task falls to me. If you have any simple, can't-fail meals like these, I'd love to have them.
- Don't remember how I found this one, but here's a simple recipe for homemade powdered laundry detergent. I don't know if Borax and Fels Naptha are the most eco-friendly detergent ingredients ever, but I'm all for them if this frugal combo works. And I don't have to melt soap on the stove, so even better. If you've made this, I'd love to hear how you liked it-- I'm considering springing this on my MOPS group for a "craft" in the spring...
- From SugarDoodle, this Thanksgiving Thankful Countdown-- liked it so much I submitted it to our MOPS newsletter. I love the idea of counting down to Thanksgiving with daily deliberate gratitude rather than relegating it to the holiday we rush through between the excesses of Halloween and Christmas.
- If you saw my posts on the spool doll nativity, you could probably guess that I have a lot of leftover wooden spools. So when I saw these spool Advent calendars on Just Something I Made, I knew I had found my next spool project. I happen to have a bunch of green ones, so I'm tempted to put mine on a wire and have a wreath-shaped Advent calendar. Hmm, maybe there will be a photo op in that one...
- And finally, the gem of Christmas preparation posts (pass this one on to the grandparents!) would be "10 Clutter-Free Gift Ideas for Kids" by Megan (of Simple Kids) on Simple Mom. We've discussed this with my folks (and they're on board!) but haven't with the in-laws yet. Wish me luck!
Tuesday, July 28, 2009
Ten-Times-Better-Than-Store-Bought Chocolate Syrup
 I'm not usually one to post photos of my stovetop (since I touch it so rarely), but that bubbling pot contains the best thing I've tasted in the last week: homemade chocolate syrup.
I found the recipe on Small Notebook -- you have to click through and see the adorable bottle Rachel put her syrup in! Rachel got the recipe from Amy Dacyczyn’s The Complete Tightwad Gazette (a book that I'm putting on my library hold list right now):
- ½ c. cocoa powder
- 1 c. water
- 2 c. sugar
- ⅛ tsp salt
- ¼ tsp vanilla
Mix the cocoa powder and the water in a saucepan. Heat on stovetop, stirring to dissolve the cocoa. Add the sugar, and stir to dissolve. Boil for 3 minutes over medium heat. (Don't let it get too hot and boil over!) Add the salt and the vanilla. Let cool. Pour into a clean glass jar, and store in the refrigerator. Yields two cups.
10 times better than store-bought (and no corn syrup), this recipe only called for 5 simple ingredients (counting the water), all of which I had on hand. Try it once, and you'll never buy that brown plastic bottle again. Try it over vanilla ice cream with smushed raspberries and you will have the most perfect summer dessert EVER!Saturday, July 4, 2009
Jam Wars
If you've been reading along, bloggy friends, then you know that I've been all about the freezer jam this summer. It's all part of my transformation into a housewife since moving to Corvallis, but that's another post to come...
Anyway, when we moved into this house a year ago, we found that we were blessed with 2 Royal Ann cherry trees. (And no, I'm not being sarcastic in saying blessed, as cherries are Other Half's absolute favorite fruit.) However, this blessing (like any other?) brings responsibility as well and that would be consuming said cherries. Since we knew nothing about pruning the trees and never got around to it this winter, we have a rather abundant crop for just 2 trees.
A week ago we got rather industrious with picking the cherries and ended up with 5 gallons to process-- yes, I filled that same bucket that the 30 pounds of strawberries came in the week before. These cherries, however, were certainly not pitted and ready to go, so processing them took way more than two and a half hours. Over the course of the next couple days, some were dried, some were juiced and made into popsicles, some were cooked into killer pies and scones (Other Half is quite the baker), and of course, I made more freezer jam.
 Batch Number 1 was made with my new favorite pectin, the Ball Freezer Jam Fruit Pectin (which I've since found is cheaper at Winco than at Bi-Mart for you local bloggy friends.) I love this pectin because it uses much less sugar than traditional pectin. For both my strawberry and cherry freezer jams, I used 4 cups of smushed fruit with 1 packet of pectin and only 1.5 cups of sugar for 6 jars of jam. (The packet say 5 jars, so we must have juicier fruit in Oregon.) With less sugar, I think the bright fresh fruit flavor really comes through and I feel like I'm eating smushed fruit, not loads of sugar.
 For Batch Number 2, Other Half wondered if cooked cherry jam might taste even better, reasoning that cooking the cherries would bring out their flavor even more. So the Jam Wars were on! I got out the pectin from the cupboard and turned to my trusty Ball Blue Book for a recipe for a cooked cherry freezer jam. This batch also made 6 half-pints, but only required 2 cups of crushed fruit (not 4) and used 4 cups of sugar (not 1.5). Besides the pectin, I also needed 1 tablespoon of lemon juice and 3/4 cup of water. Not only did this have more ingredients and more sugar, it required turning on the stove, something I do as little as possible when the temps are in the 90s. (OK, I do this as little as possible period, but it's not my fault that Other Half is a great cook as well as a great baker...) But, for the sake of the perfect jam, I tried to withhold judgment.
So which batch won the Jam Wars? Thankfully, we both preferred Batch Number 1. Although cooking the cherries does change the flavor, the traditional recipe just has too little fruit and too much sugar to get that same burst of fresh cherry flavor. So lucky me, the easy way is the better way and I'll now be stuffing my garage freezer with no-cook cherry jam, along with the strawberry.
Blueberries are now in season, so maybe they'll be next...
Anyway, when we moved into this house a year ago, we found that we were blessed with 2 Royal Ann cherry trees. (And no, I'm not being sarcastic in saying blessed, as cherries are Other Half's absolute favorite fruit.) However, this blessing (like any other?) brings responsibility as well and that would be consuming said cherries. Since we knew nothing about pruning the trees and never got around to it this winter, we have a rather abundant crop for just 2 trees.
A week ago we got rather industrious with picking the cherries and ended up with 5 gallons to process-- yes, I filled that same bucket that the 30 pounds of strawberries came in the week before. These cherries, however, were certainly not pitted and ready to go, so processing them took way more than two and a half hours. Over the course of the next couple days, some were dried, some were juiced and made into popsicles, some were cooked into killer pies and scones (Other Half is quite the baker), and of course, I made more freezer jam.
 Batch Number 1 was made with my new favorite pectin, the Ball Freezer Jam Fruit Pectin (which I've since found is cheaper at Winco than at Bi-Mart for you local bloggy friends.) I love this pectin because it uses much less sugar than traditional pectin. For both my strawberry and cherry freezer jams, I used 4 cups of smushed fruit with 1 packet of pectin and only 1.5 cups of sugar for 6 jars of jam. (The packet say 5 jars, so we must have juicier fruit in Oregon.) With less sugar, I think the bright fresh fruit flavor really comes through and I feel like I'm eating smushed fruit, not loads of sugar.
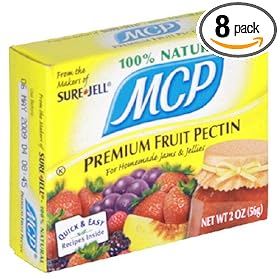 For Batch Number 2, Other Half wondered if cooked cherry jam might taste even better, reasoning that cooking the cherries would bring out their flavor even more. So the Jam Wars were on! I got out the pectin from the cupboard and turned to my trusty Ball Blue Book for a recipe for a cooked cherry freezer jam. This batch also made 6 half-pints, but only required 2 cups of crushed fruit (not 4) and used 4 cups of sugar (not 1.5). Besides the pectin, I also needed 1 tablespoon of lemon juice and 3/4 cup of water. Not only did this have more ingredients and more sugar, it required turning on the stove, something I do as little as possible when the temps are in the 90s. (OK, I do this as little as possible period, but it's not my fault that Other Half is a great cook as well as a great baker...) But, for the sake of the perfect jam, I tried to withhold judgment.
So which batch won the Jam Wars? Thankfully, we both preferred Batch Number 1. Although cooking the cherries does change the flavor, the traditional recipe just has too little fruit and too much sugar to get that same burst of fresh cherry flavor. So lucky me, the easy way is the better way and I'll now be stuffing my garage freezer with no-cook cherry jam, along with the strawberry.
Blueberries are now in season, so maybe they'll be next...
Tuesday, June 23, 2009
30 Pounds of Strawberries & 2.5 hours
Before: After:
 In case you ever have use for this piece of trivia, a 30-pound pail of sliced strawberries will yield 13 jars of freezer jam, 15 quarts of sliced strawberries, and 1 bowl left for fresh eating on top of pancakes for dinner. As for the 2.5 hours, I promise it goes fast when you don't cook any of the berries or process the jars as I am certainly no kitchen wizard.
(Oh, and this bounty was after the 9 pounds the kiddos picked last week at Twedt's which yielded 12 jars of freezer jam and 2 bowls for fresh eating...)
If you're curious about the specifics, I used this pectin from Bi-Mart, which only required a cup and a half of sugar for every 4 cups of crushed berries for no-cook freezer jam. For the sliced berries, I mixed in 1 tablespoon of lemon juice and 1/3 cup of sugar for each quart before freezing-- there's no other liquid added because the berries were just that juicy! Ask me in a couple of months if I would change the amounts of lemon juice and sugar-- I couldn't find any sites that took into account the juiciness and softness of Oregon berries!
 After:
 In case you ever have use for this piece of trivia, a 30-pound pail of sliced strawberries will yield 13 jars of freezer jam, 15 quarts of sliced strawberries, and 1 bowl left for fresh eating on top of pancakes for dinner. As for the 2.5 hours, I promise it goes fast when you don't cook any of the berries or process the jars as I am certainly no kitchen wizard.
(Oh, and this bounty was after the 9 pounds the kiddos picked last week at Twedt's which yielded 12 jars of freezer jam and 2 bowls for fresh eating...)
If you're curious about the specifics, I used this pectin from Bi-Mart, which only required a cup and a half of sugar for every 4 cups of crushed berries for no-cook freezer jam. For the sliced berries, I mixed in 1 tablespoon of lemon juice and 1/3 cup of sugar for each quart before freezing-- there's no other liquid added because the berries were just that juicy! Ask me in a couple of months if I would change the amounts of lemon juice and sugar-- I couldn't find any sites that took into account the juiciness and softness of Oregon berries!
Tuesday, March 24, 2009
Overcoming my Domestic Challenges: Baking Bread
Being that I don't consider myself a cook and can only bake cookies, I've never dreamed of baking a loaf of bread to accompany the evening meal. All that kneading and rising, I was pretty sure that bread was something I'd wreck pretty easily.
 However, that has all changed, thanks to Artisan Bread in Five Minutes a Day by Jeff Hertzberg and Zoe Francois. Now not only am I baking bread (and "artisan" bread, no less), but I consider it the easiest chore of my day. Before this book and its Master Recipe, I never would have believed you if you had told me that I could mix up a batch of bread or get the day's bread into the oven in less time than it takes to do the dishes.
I first found the Master Recipe online here, but the basic premise is this: you mix 4 ingredients together (in your stand mixer to make it truly easy-peasy) and you let the giant batch of dough rise in a giant container for at least 2 hours before you stash it in the fridge overnight. The next day, you take out a chunk a couple hours before dinner, shape it, let it rise like this:
 and then after 30 minutes in the oven, you have this:
 The genius of this recipe is that you have enough dough for at least 4 loaves and it will keep in the fridge just fine. In fact, the older it is, the more of a sourdough flavor it develops. Yum!
I also learned that Hertzberg and Francois have a website for the book with a great Q & A section. When I messed up Batch #1 with dead yeast (told you I was no baker!), Zoe responded to my query in less than a day with a way to salvage my batch.
Being the non-baker that I am, I have come up with ways to make this even easier. When baking the basic loaf, I still bake it on a pizza stone, but I bake it right on my silicone mat so that I don't have to mess with sliding the sticky dough onto a hot stone. Or, I just dump the whole thing into a loaf pan and bake it without the stone. Simpler, and just as tasty, according to my family.
We also created a variation, due to a shortage of all-purpose flour in the pantry, that I later discovered was the exact recipe for the Light Whole Wheat Bread in the book. Instead of using a full 6 and 1/2 cups of unbleached all-purpose flour, we substitute in 1 - 2 cups of whole-wheat AP flour. Since we eat mostly whole wheat bread, this was even tastier to us than the master recipe.
It works for me. For more tips, head over to this week's post at We Are THAT Family.
 However, that has all changed, thanks to Artisan Bread in Five Minutes a Day by Jeff Hertzberg and Zoe Francois. Now not only am I baking bread (and "artisan" bread, no less), but I consider it the easiest chore of my day. Before this book and its Master Recipe, I never would have believed you if you had told me that I could mix up a batch of bread or get the day's bread into the oven in less time than it takes to do the dishes.
I first found the Master Recipe online here, but the basic premise is this: you mix 4 ingredients together (in your stand mixer to make it truly easy-peasy) and you let the giant batch of dough rise in a giant container for at least 2 hours before you stash it in the fridge overnight. The next day, you take out a chunk a couple hours before dinner, shape it, let it rise like this:
 and then after 30 minutes in the oven, you have this:
 The genius of this recipe is that you have enough dough for at least 4 loaves and it will keep in the fridge just fine. In fact, the older it is, the more of a sourdough flavor it develops. Yum!
I also learned that Hertzberg and Francois have a website for the book with a great Q & A section. When I messed up Batch #1 with dead yeast (told you I was no baker!), Zoe responded to my query in less than a day with a way to salvage my batch.
Being the non-baker that I am, I have come up with ways to make this even easier. When baking the basic loaf, I still bake it on a pizza stone, but I bake it right on my silicone mat so that I don't have to mess with sliding the sticky dough onto a hot stone. Or, I just dump the whole thing into a loaf pan and bake it without the stone. Simpler, and just as tasty, according to my family.
We also created a variation, due to a shortage of all-purpose flour in the pantry, that I later discovered was the exact recipe for the Light Whole Wheat Bread in the book. Instead of using a full 6 and 1/2 cups of unbleached all-purpose flour, we substitute in 1 - 2 cups of whole-wheat AP flour. Since we eat mostly whole wheat bread, this was even tastier to us than the master recipe.
It works for me. For more tips, head over to this week's post at We Are THAT Family.
Subscribe to:
Posts (Atom)